Connecting
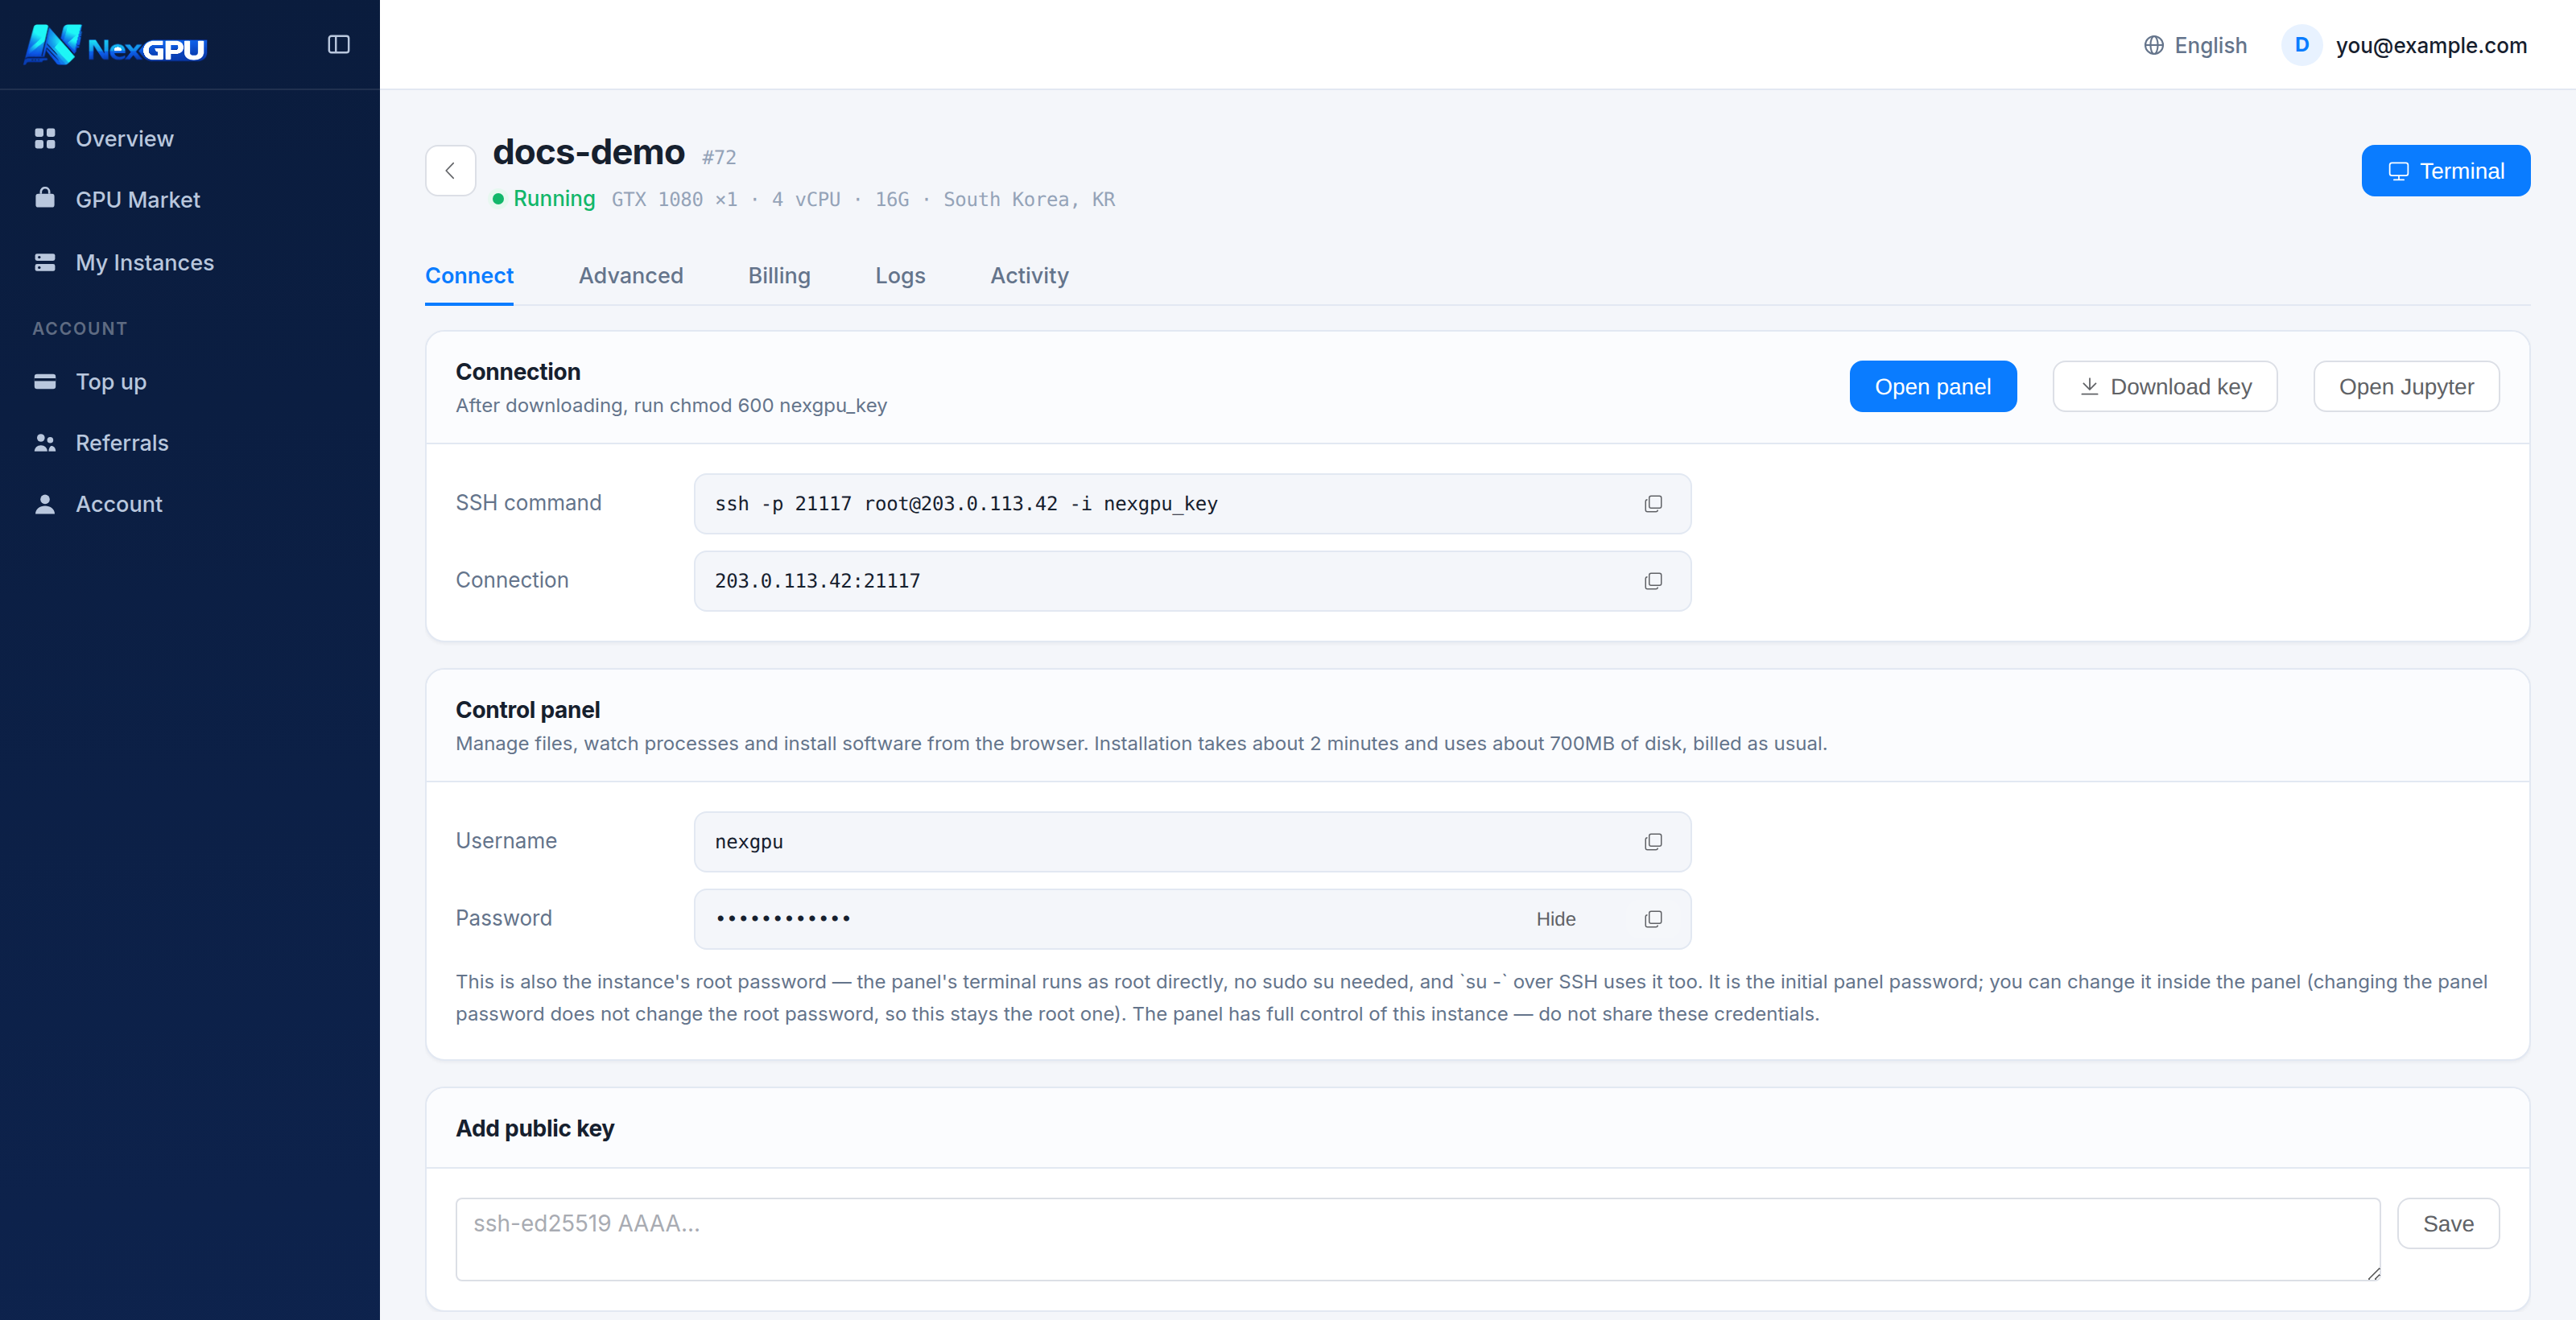
Once the state reads Running, click the instance name; the "Connect" tab opens by default.
Option 1: web terminal (easiest)
The blue Terminal button at the top right opens a root shell in your browser.
Nothing to install, no key to download, no SSH to configure. Best for a quick look or a one-off command.
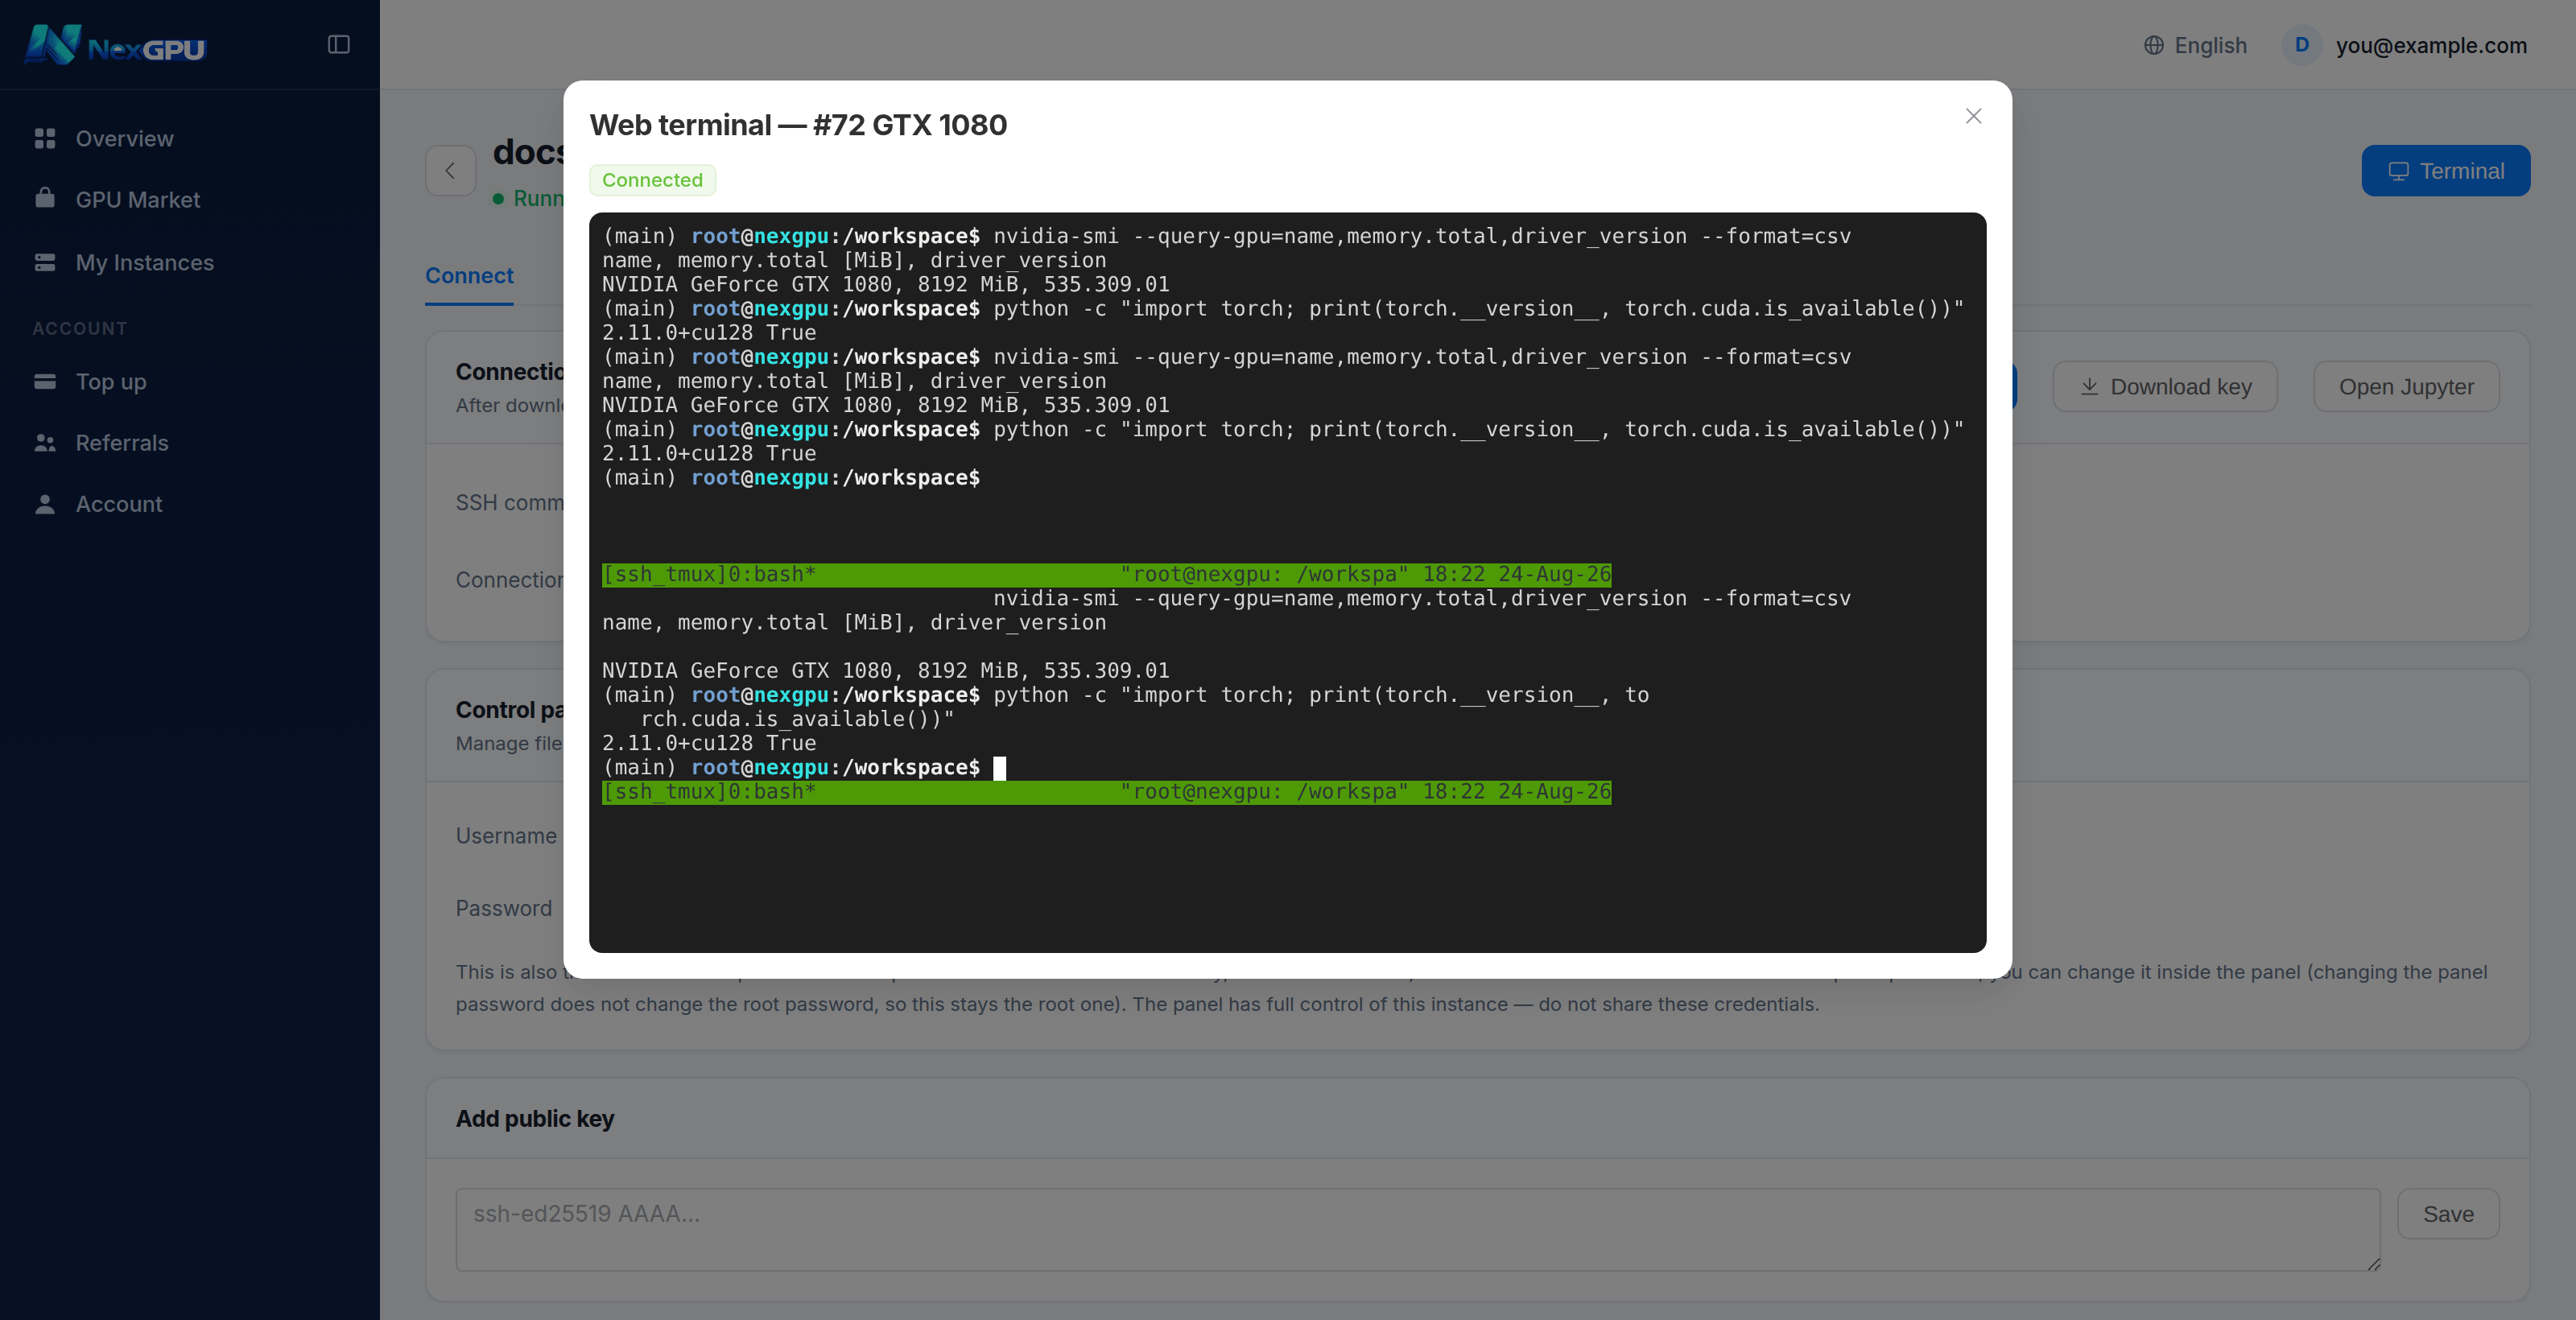
The two commands worth running first — confirm the GPU is there, and confirm the framework can see it:
nvidia-smi --query-gpu=name,memory.total,driver_version --format=csv
python -c "import torch; print(torch.__version__, torch.cuda.is_available())"
True means CUDA is working and you can get started.
Option 2: direct SSH
The Connection panel gives you two things:
| Field | Use |
|---|---|
| SSH command | Paste straight into your local terminal |
| Connection | IP:port for VS Code Remote, FinalShell and similar |
Click Download key for the private key, then:
# ssh refuses to use a key with loose permissions
chmod 600 nexgpu_key
# Run the command shown on the page
:::tip Your own key is more convenient
Paste your ssh-ed25519 AAAA... public key under "Add public key" and save, then connect with your own private key instead of downloading one per instance.
To have every future instance carry it automatically, set a default key in Account settings.
:::
:::info This is a direct connection The address is the machine's own public IP and port. There is no relay in between, so latency is simply your distance to that machine. :::
Option 3: Jupyter
If the environment ships Jupyter, "Open Jupyter" is enabled. It opens in a new tab with the token already applied.
:::warning Your browser will warn "connection is not private" first That is expected — direct Jupyter access uses the instance's self-signed certificate. The page explains this and offers "I understand, open anyway". :::
Port mappings: running your own service
Open the Advanced tab; the port mapping table is at the top.
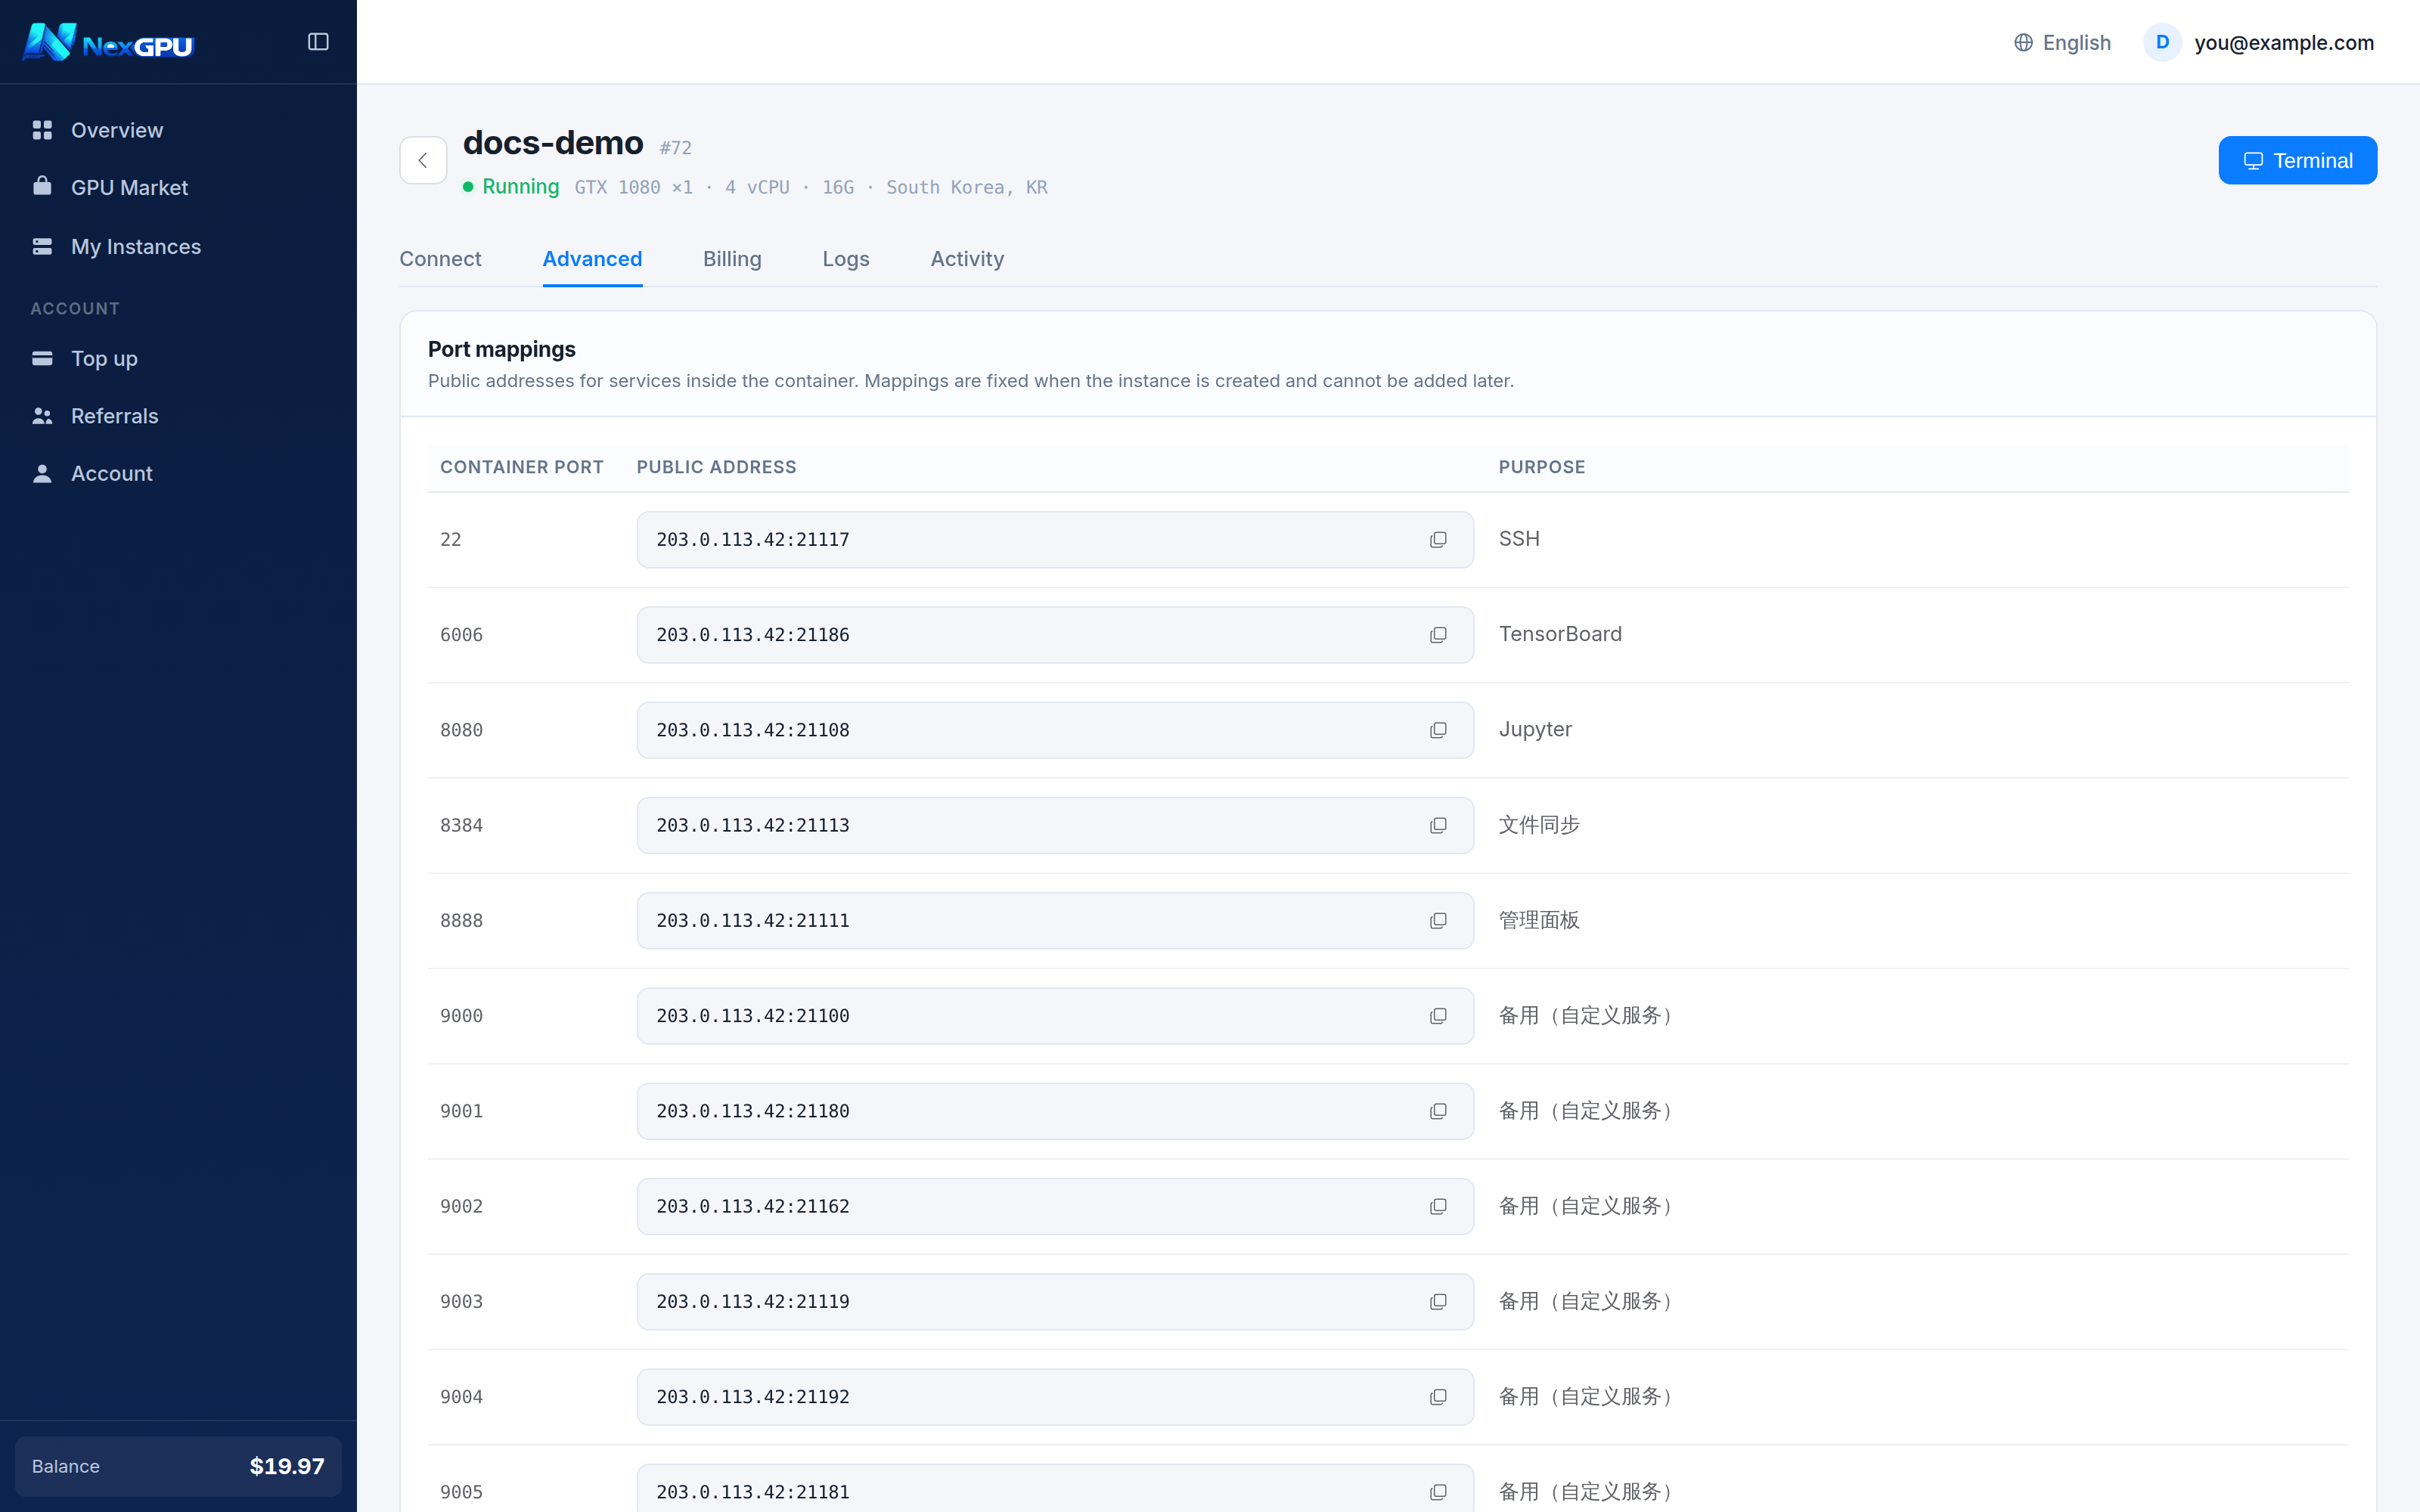
Left is the port inside the container, middle is the matching public address, right is what it is for.
Beyond the reserved purposes (SSH, Jupyter, TensorBoard, control panel), ports 9000–9009 are set aside for your own services: listen on any of them inside the container and reach it at the public address in the table.
For example, serving with vLLM:
# Listen on 9000 inside the instance
vllm serve Qwen/Qwen2.5-7B-Instruct --port 9000 --host 0.0.0.0
Then use the public address from the 9000 row, e.g. http://203.0.113.42:21100/v1.
:::danger Port mappings are fixed at creation They cannot be added or changed afterwards. Decide how many services you will expose before ordering. If the spare ports are not enough, you have to create a new instance. :::
:::tip Bind to 0.0.0.0
A service listening only on 127.0.0.1 is unreachable from outside the container. Remember --host 0.0.0.0 or your framework's equivalent.
:::
When you cannot connect
| Symptom | Check |
|---|---|
| SSH complains permissions are too open | chmod 600 the key file |
| Connection refused or times out | Confirm the state is Running, not Preparing |
| Your own service is unreachable | Is it on 0.0.0.0? Is the port in the table? |
| Jupyter will not open | Does the environment carry the Jupyter tag? Accept the certificate prompt |
Still stuck — message Telegram support with the instance number.